Powering up the OARBots
It is important to follow this order when booting up the OARBots. Failure to follow this order may result in certain ROS nodes failing to launch properly. If you accidentally switch the order of a step, power everything down and start again.
Installing Batteries
Each dingo base holds a maximum of 12 rechargeable batteries. The batteries can be found at the back of the room. A blinking green light indicates the battery is charging; a solid green light indicates the battery is fully charged.
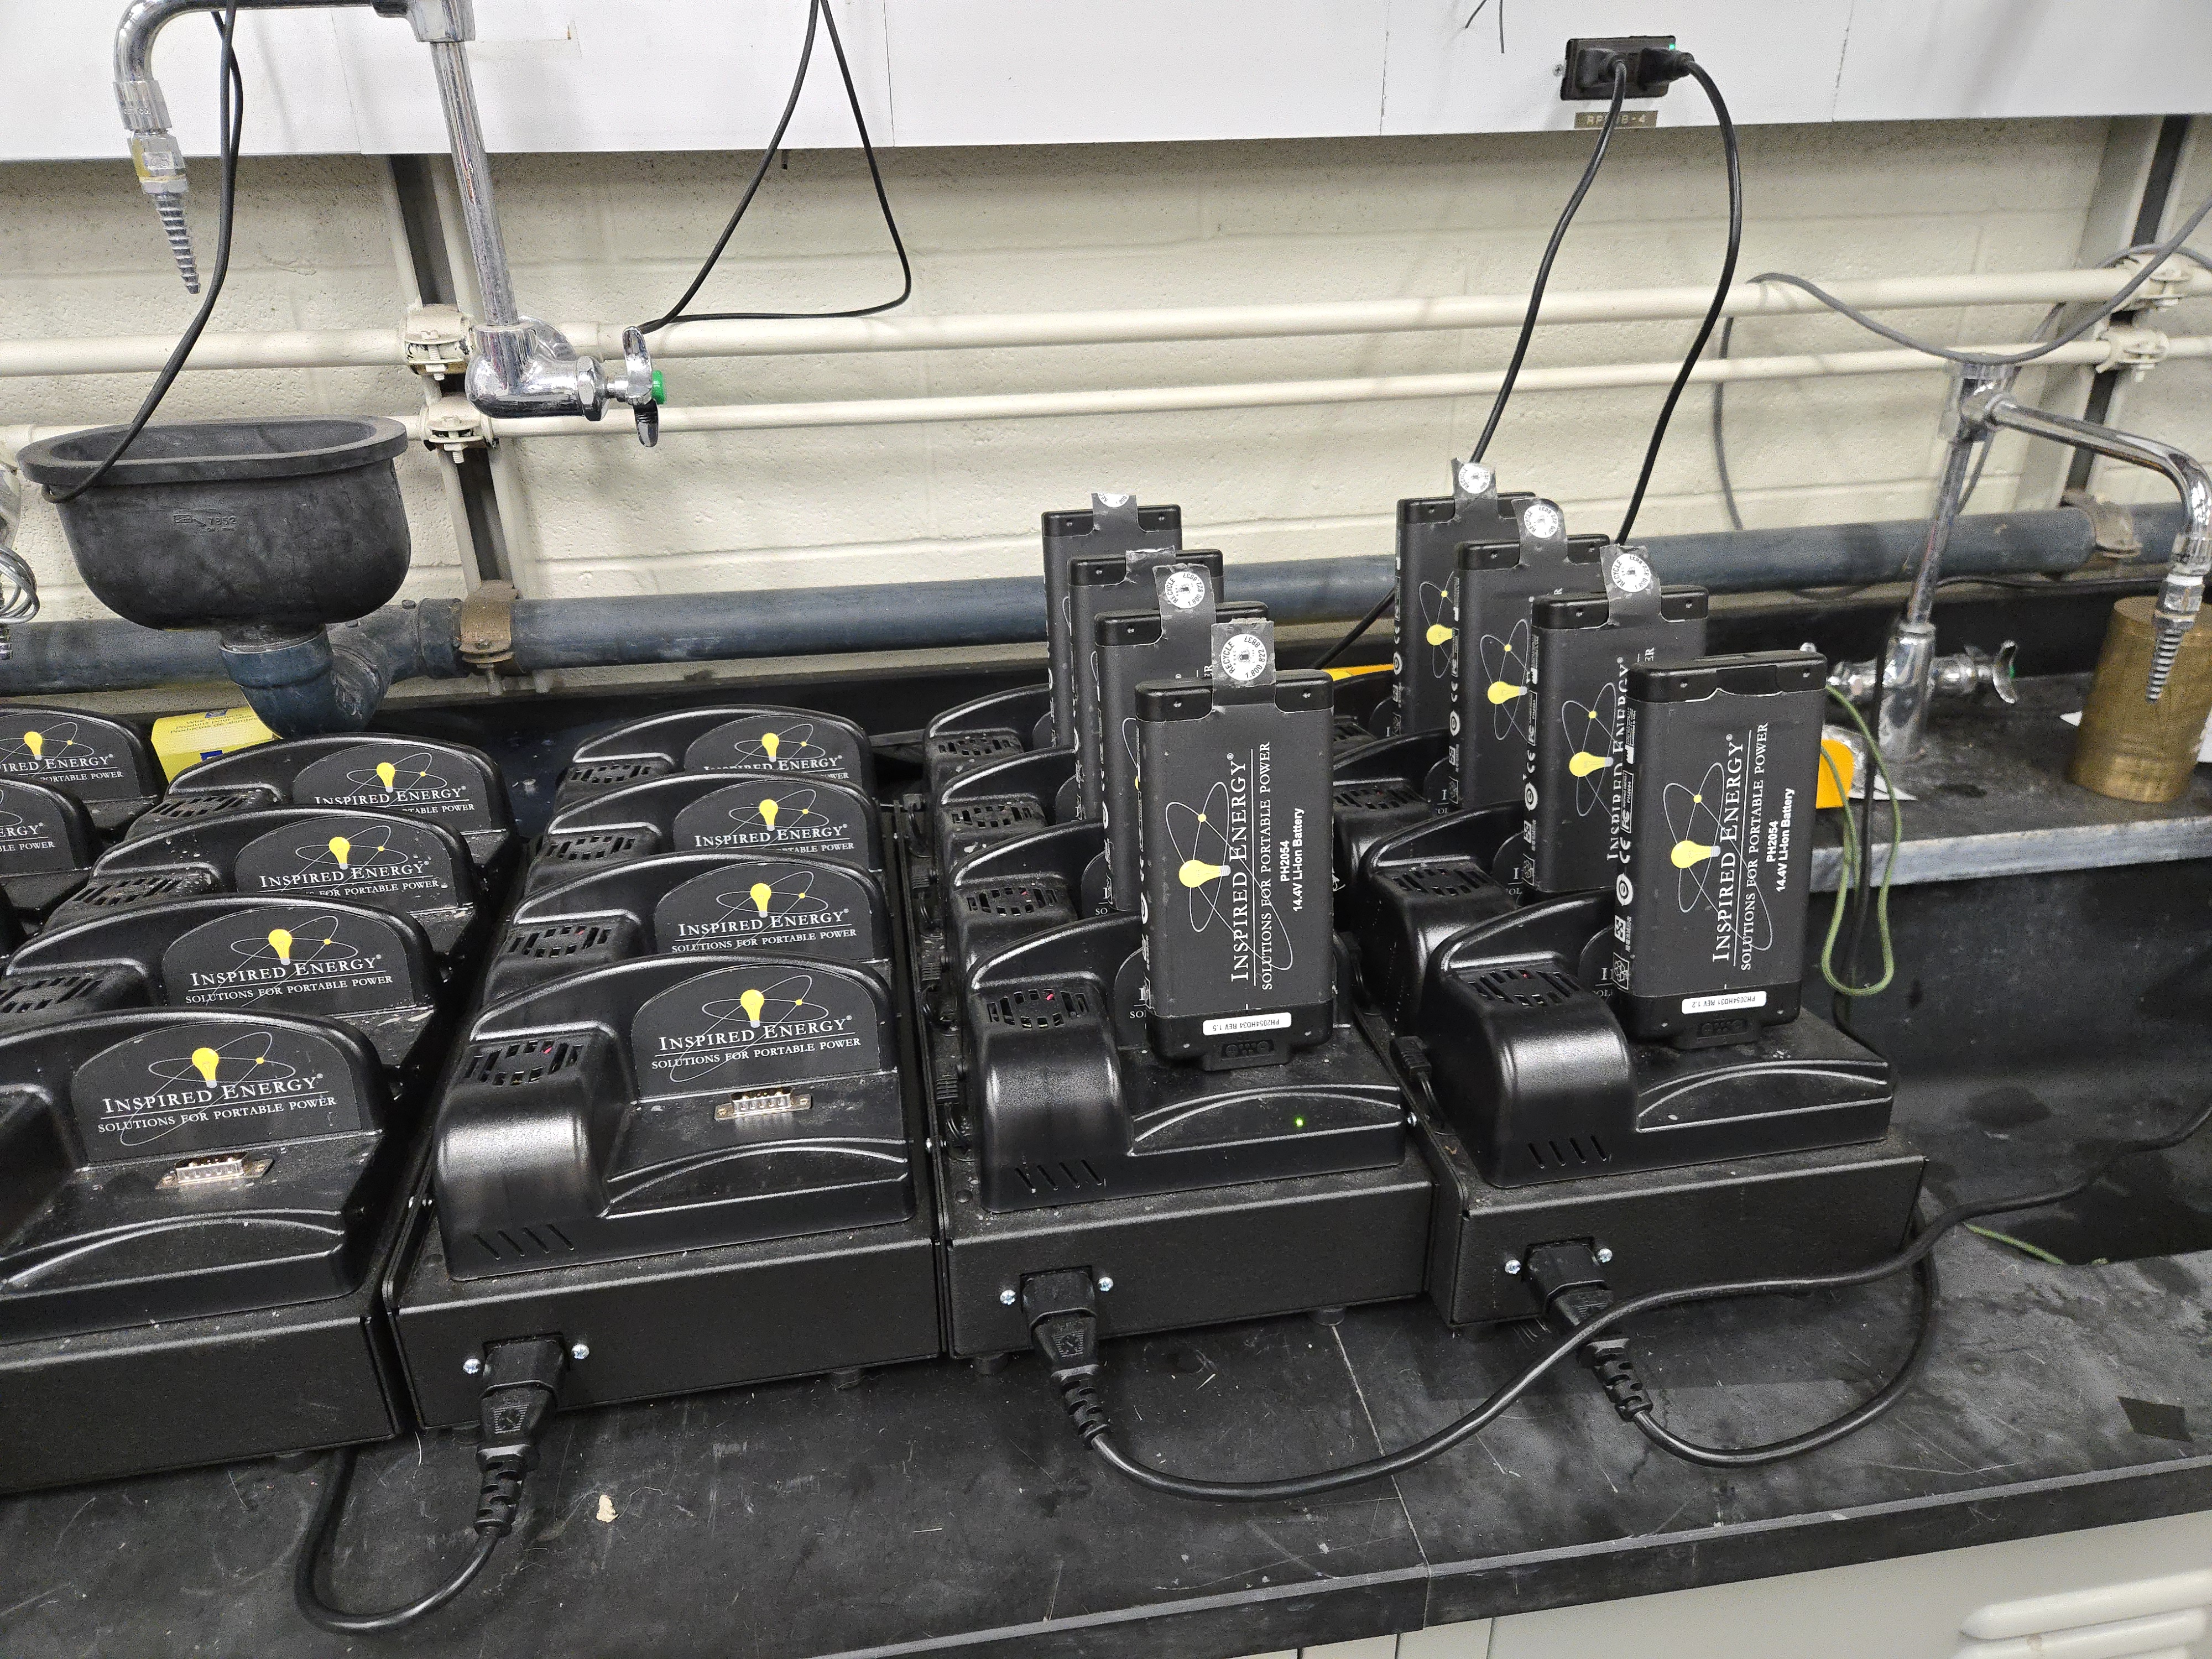
Location of the batteries and their chargers
To install the batteries, ensure the port is facing into the Dingo and that the ridges are facing inward towards the center of the robot (see photo). Start from the end of the battery case and move inward. For each battery, slide it in. You may need to wiggle it around to make sure it goes into the port, and you may need to use some slight force. To ensure the battery is properly seated, gently pull on the tag. The battery should remain seated. If not, try again.
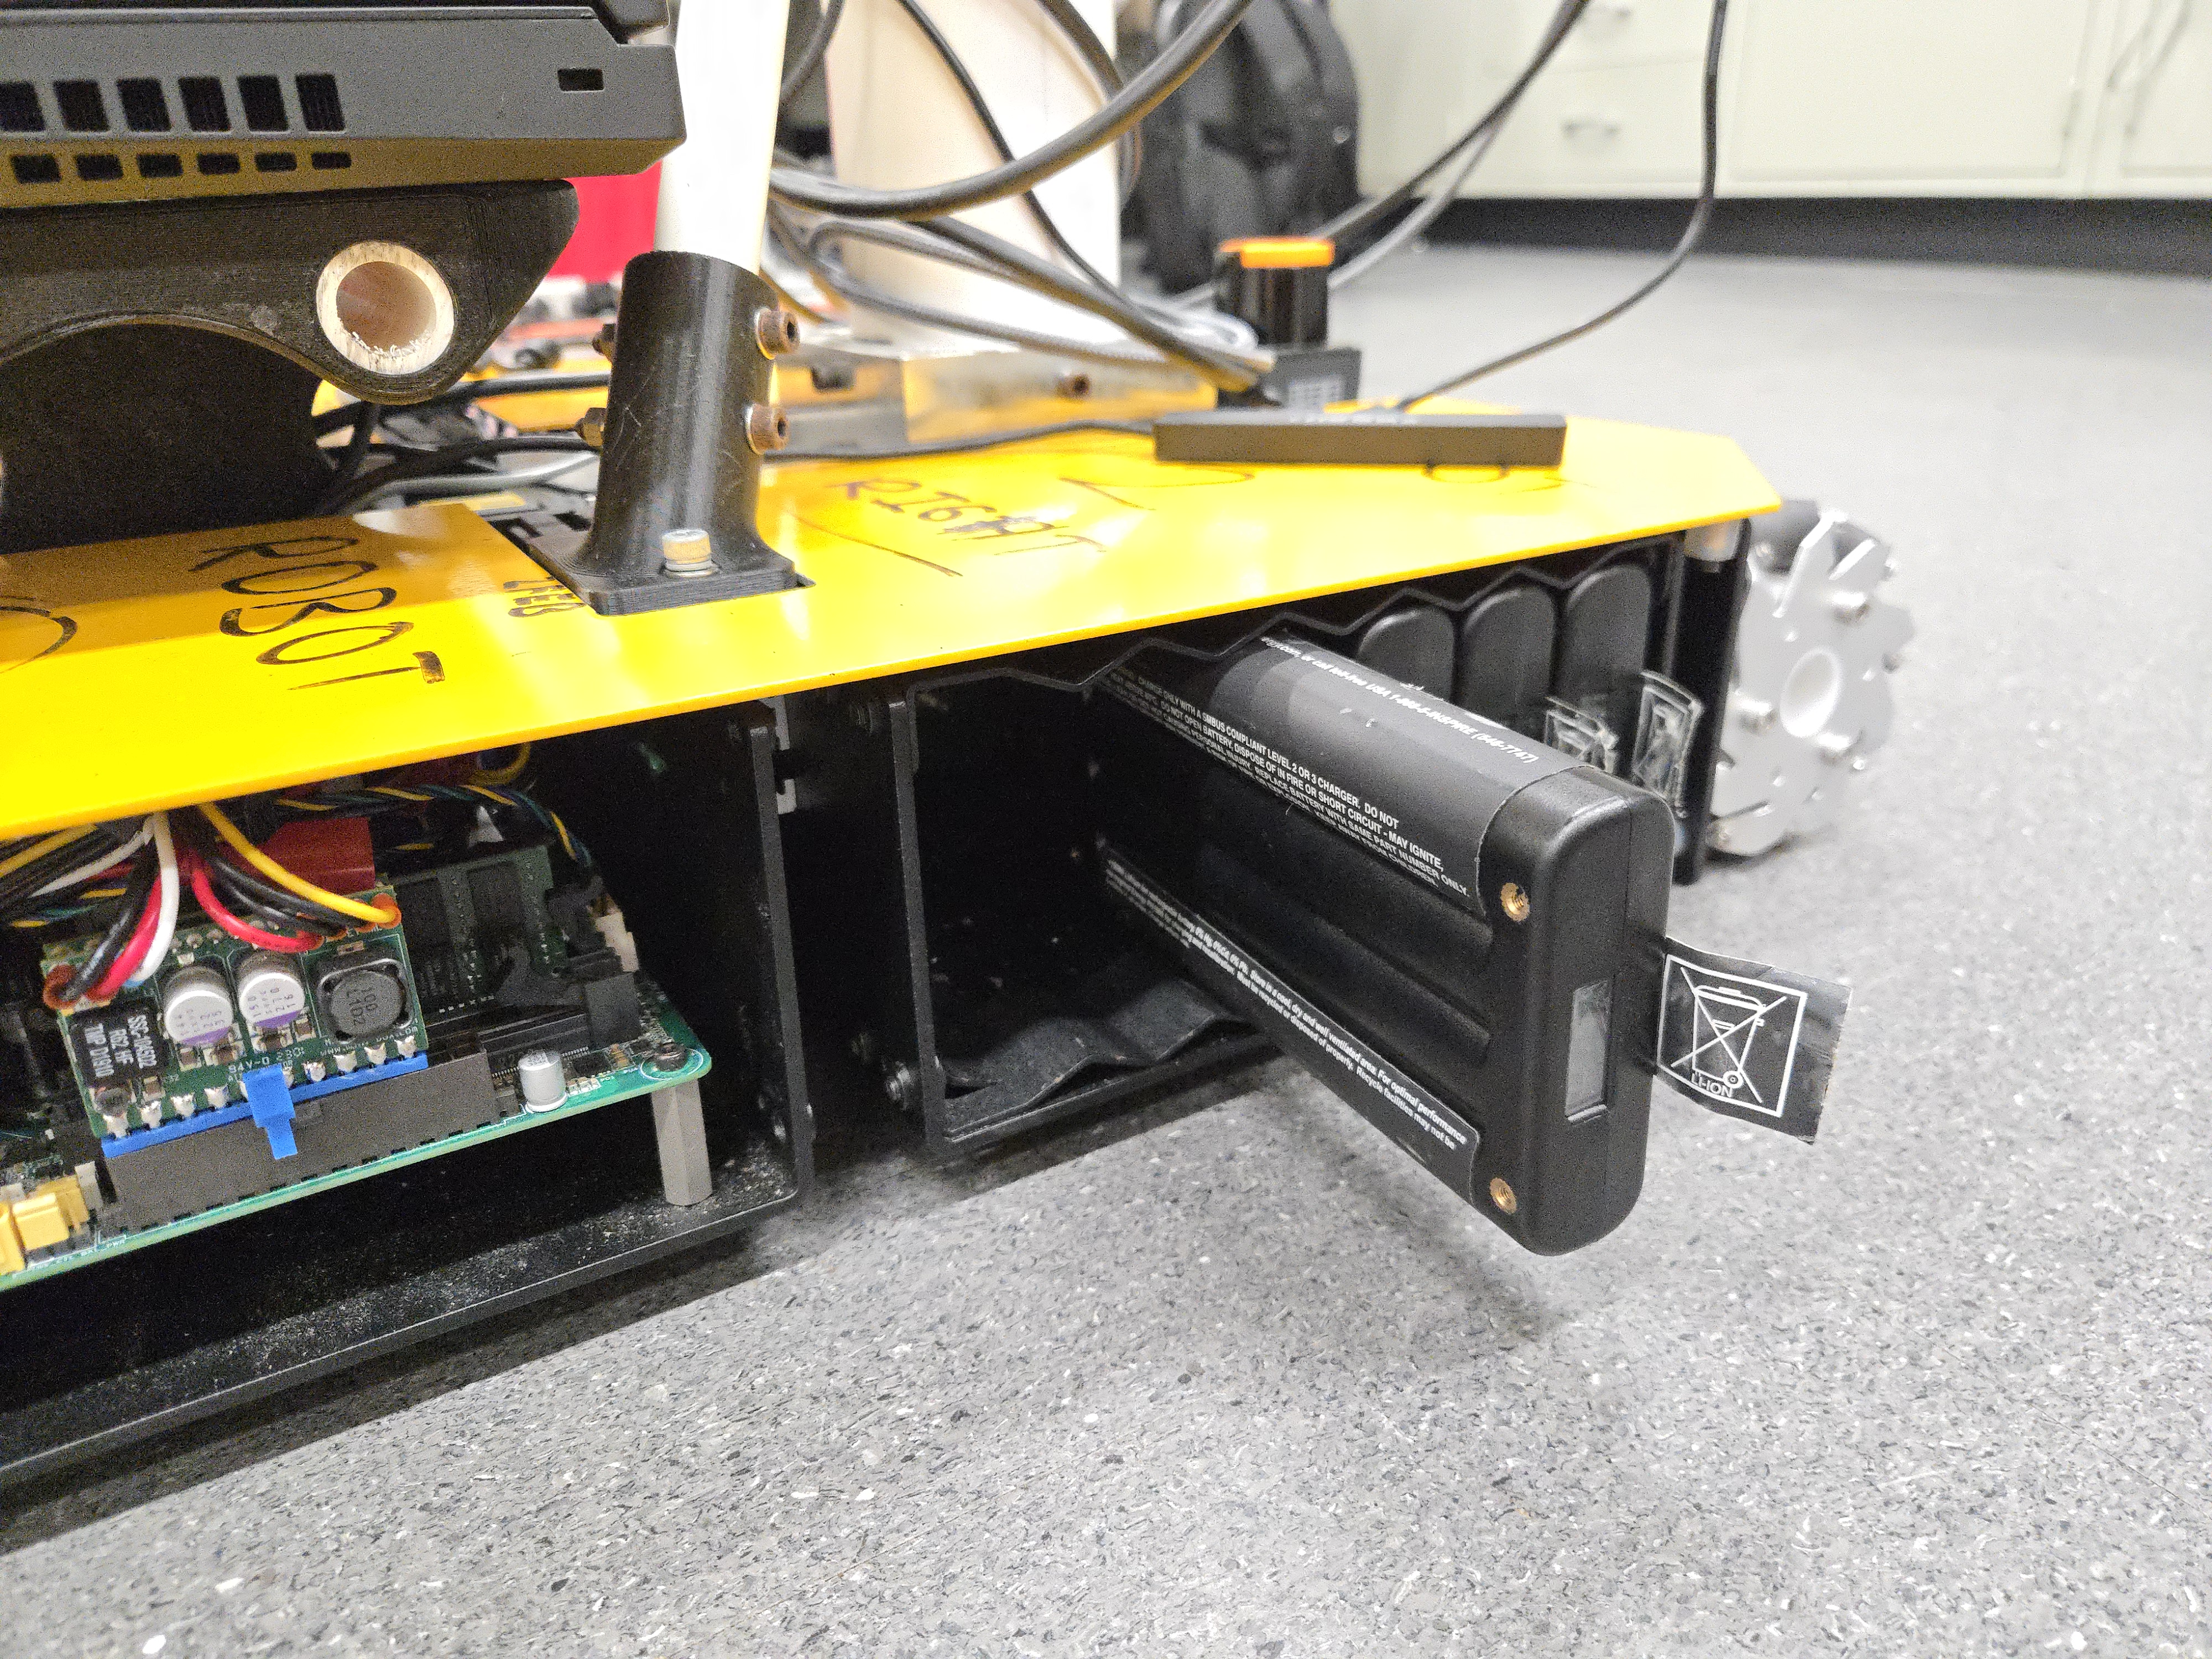
Ensure the ridges of the battery are facing towards the center of the robot
For stability, the number of batteries in one case should be the same as the number of batteries in the other case.
Although you can theoretically use as little as one battery to power the Dingo, it is recommended to never go below four batteries.
Checking Connections
Each laptop should have two USB-C connections: one directly to the Azure Kinect on the Kinova arm, and one to the USB hub on the PVC pipe. The laptop may also be plugged in, either to an offboard power brick or to the built-in power brick.
The OARBot Silver built-in power brick doesn't always charge the laptop. If this is the case, monitor the battery level of the laptop and use the offboard power brick when needed.
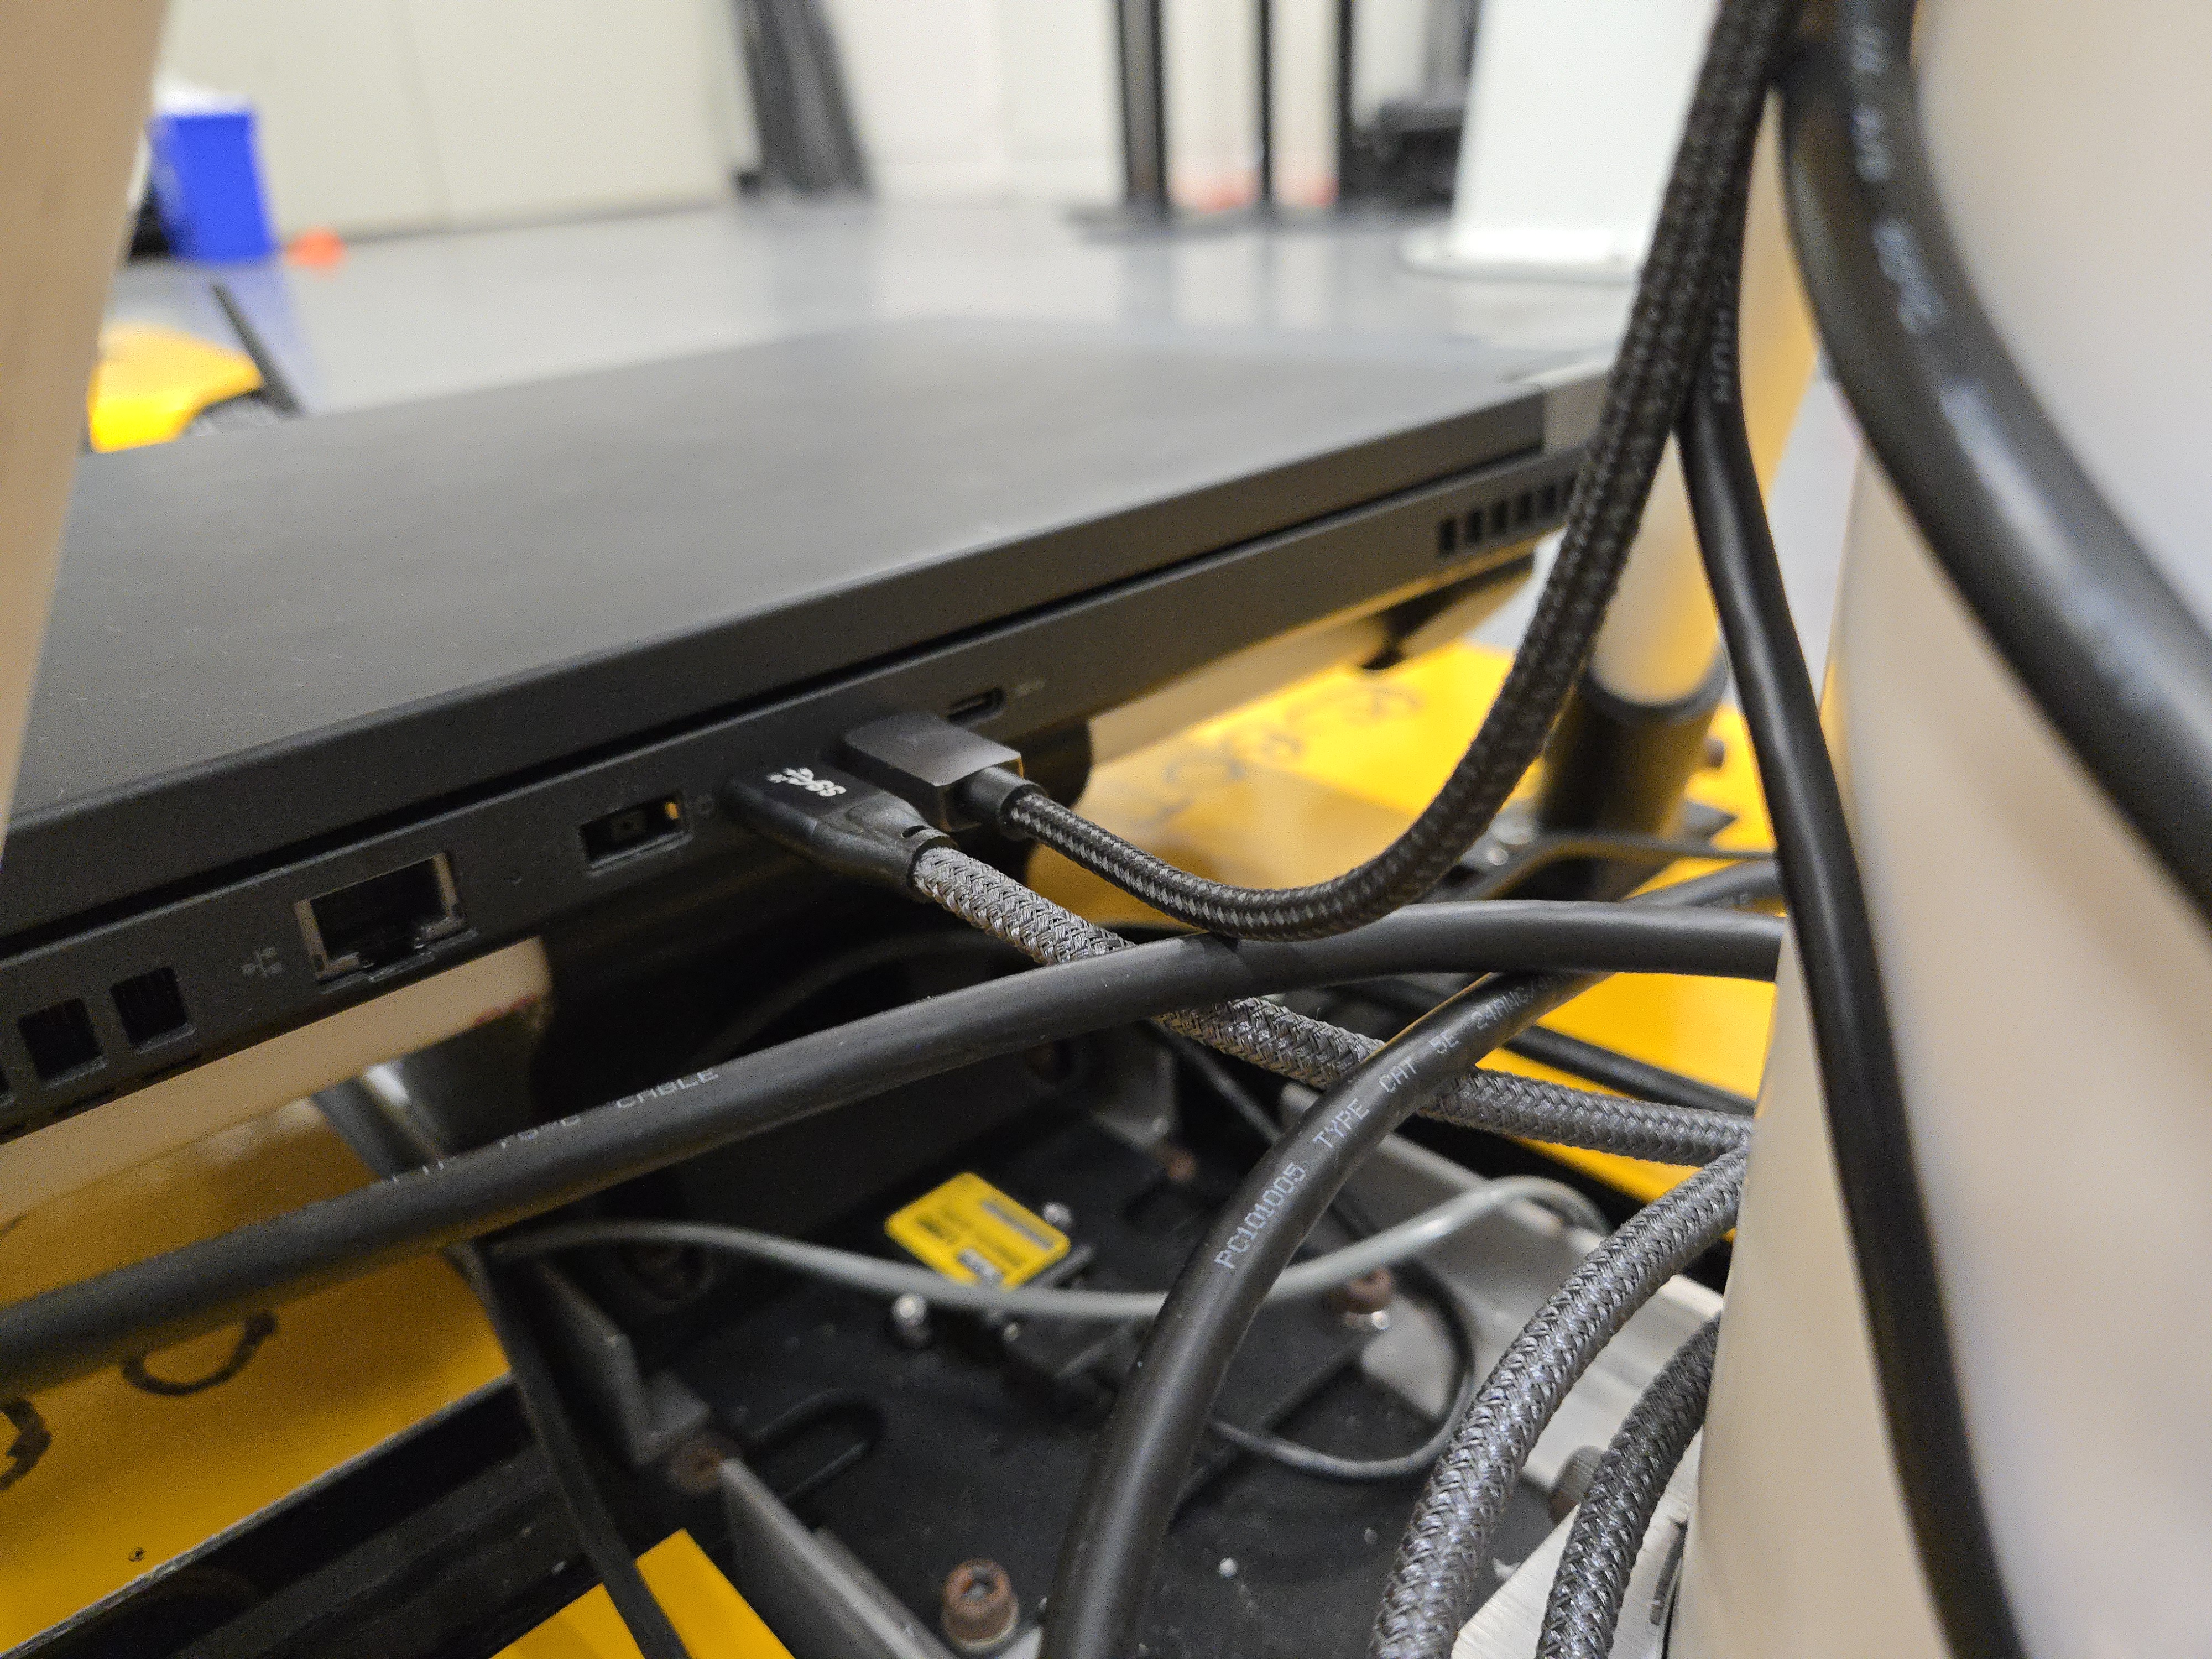
The two USB-C cables should be plugged into the back of the laptop
Powering on the Dingo Base
On the front HMI panel, press the  button to power on the Dingo.
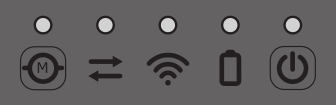
The HMI panel lights should cycle on and then off, with the power button staying blue and the battery button (to the left of the power button) staying red. Wait until the power button is solid blue and all the other lights except the motor enable button (on the left side:  ) are green and the four status indicator lights on the corners of the Dingo base are flashing red. If a light is not green or some other issue is observed, consult the Dingo user manual for more information. For info on teleoperating the Dingo base, see Teleoperation.
OARBot Blue's Dingo base is having trouble booting the internal computer after it has been off for a while. As a temporary workaround, if OARBot Blue's Dingo base is not booting up, power the system off and back on. This allows the CMOS battery to be charged during boot.
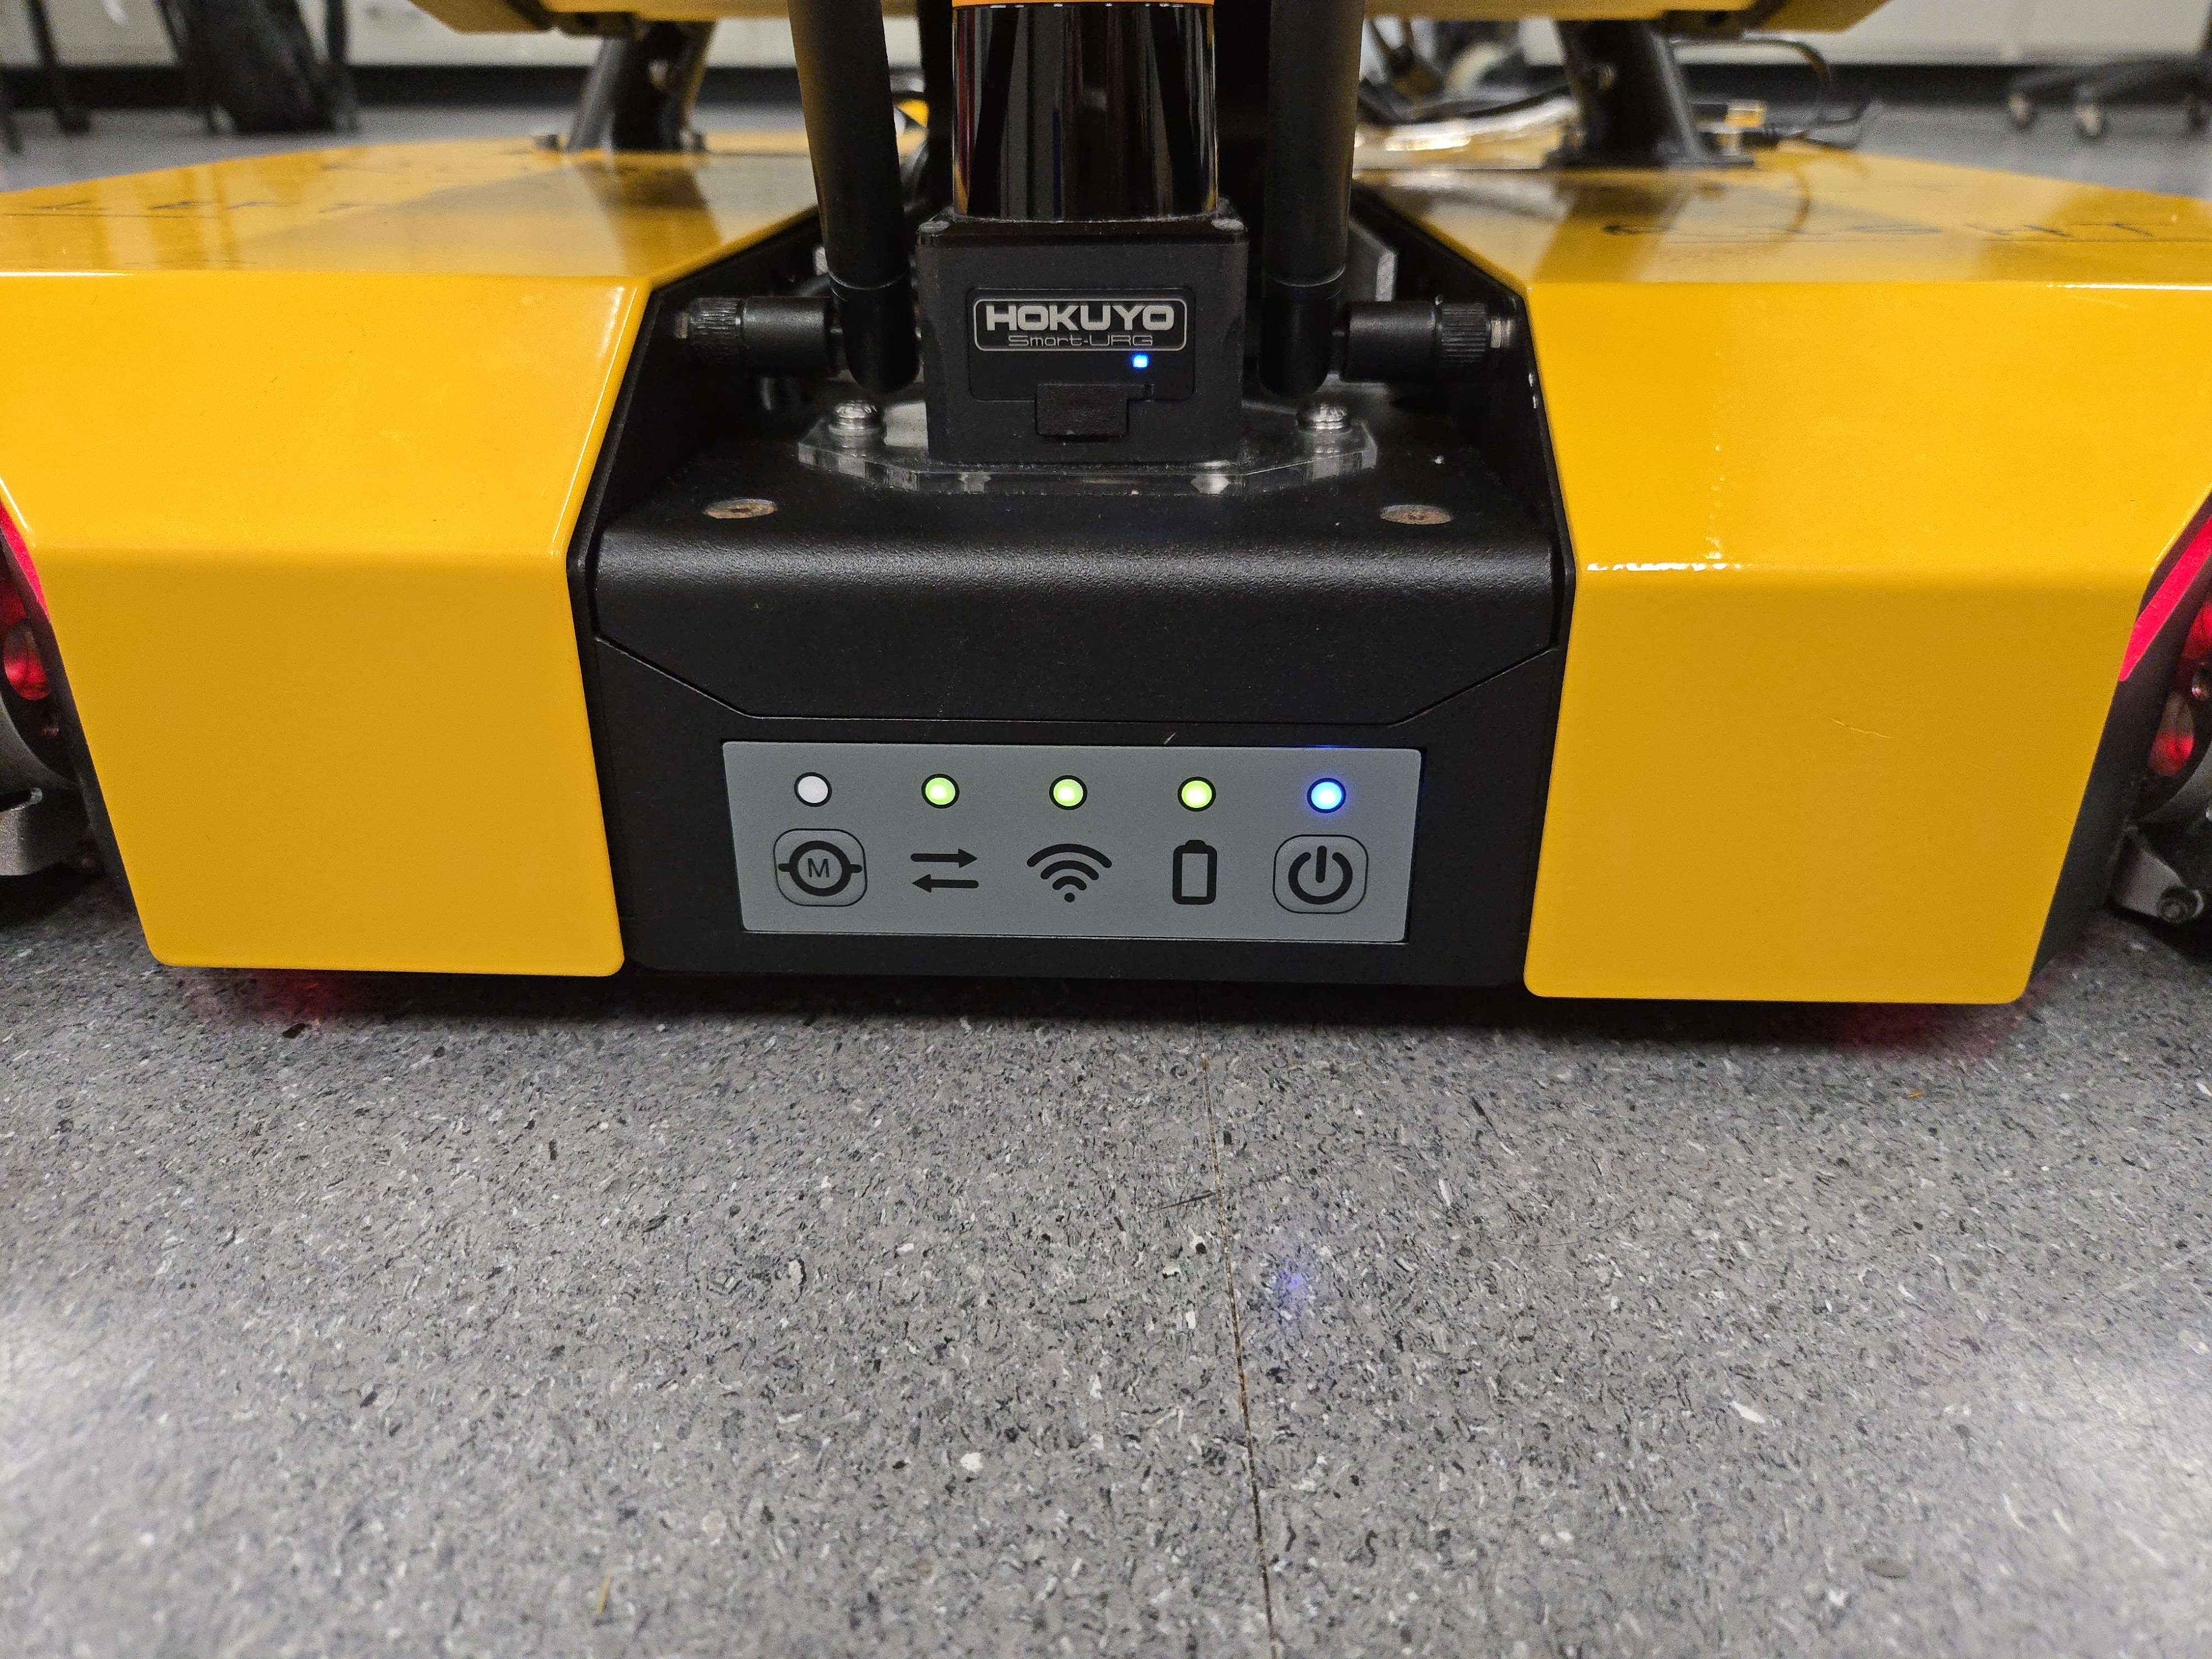
Dingo HMI in its operational state
Powering on the Kinova Jaco v2
Flip the power switch near the bottom of the Kinova arm.
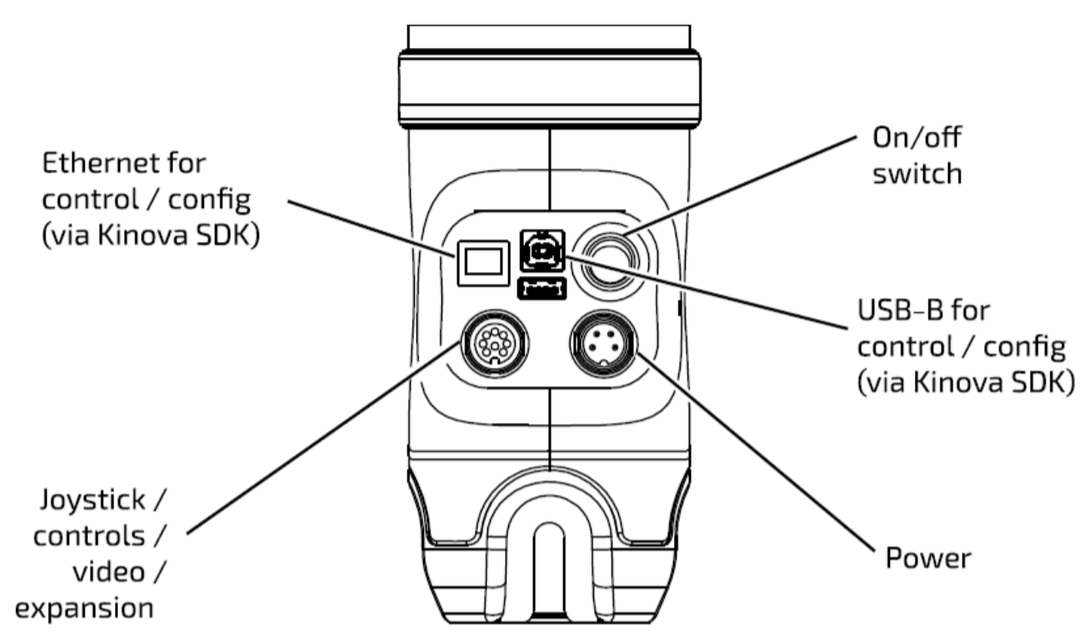
The arm power lights on the Kinova HMI should start flashing green. Wait until they turn steady green.
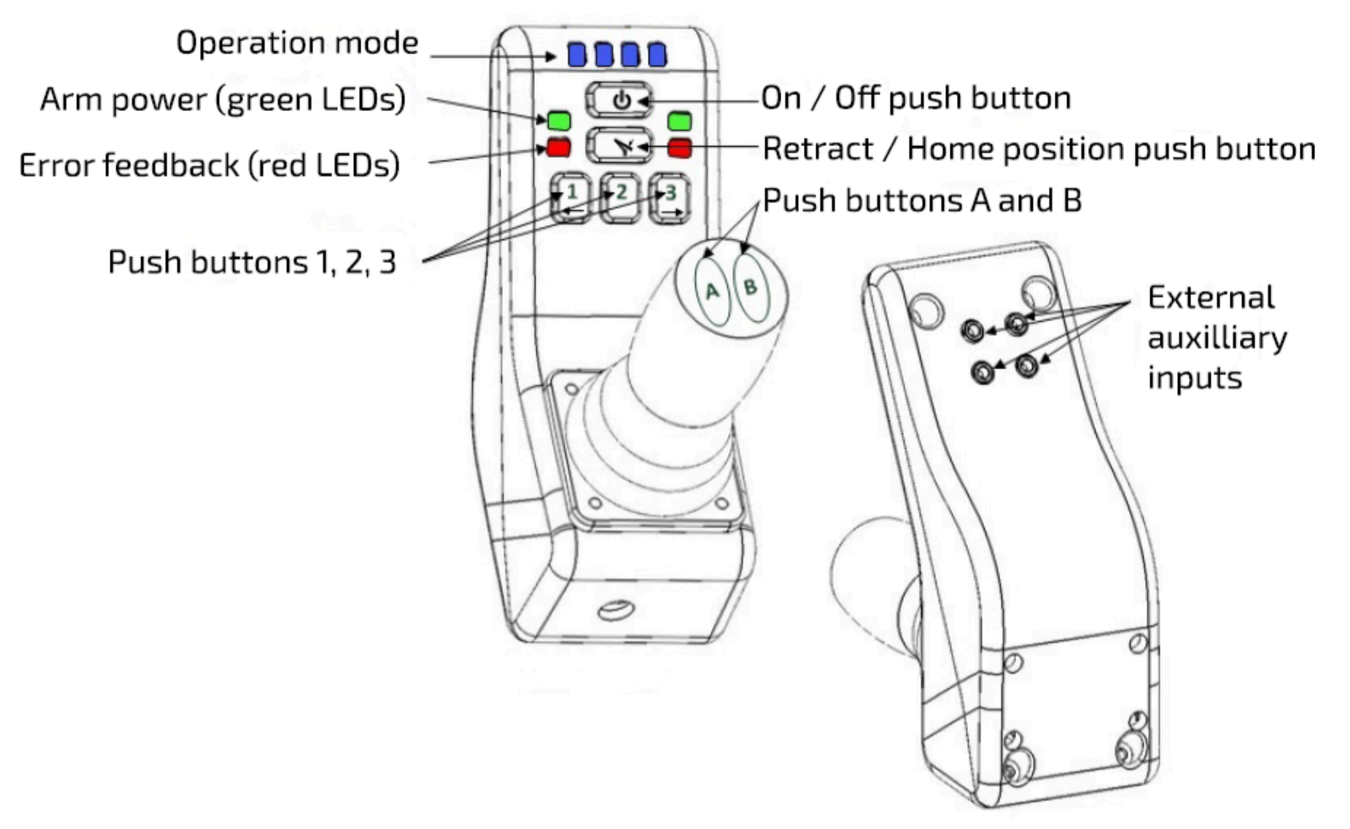
Hold down the retract / home position button until the arm is not moving. Release the button, and the leftmost blue light on the HMI should appear. If any issues occur, consult the Kinova Jaco v2 user guide. For info on teleoperating the Kinova arm, see Teleoperation.
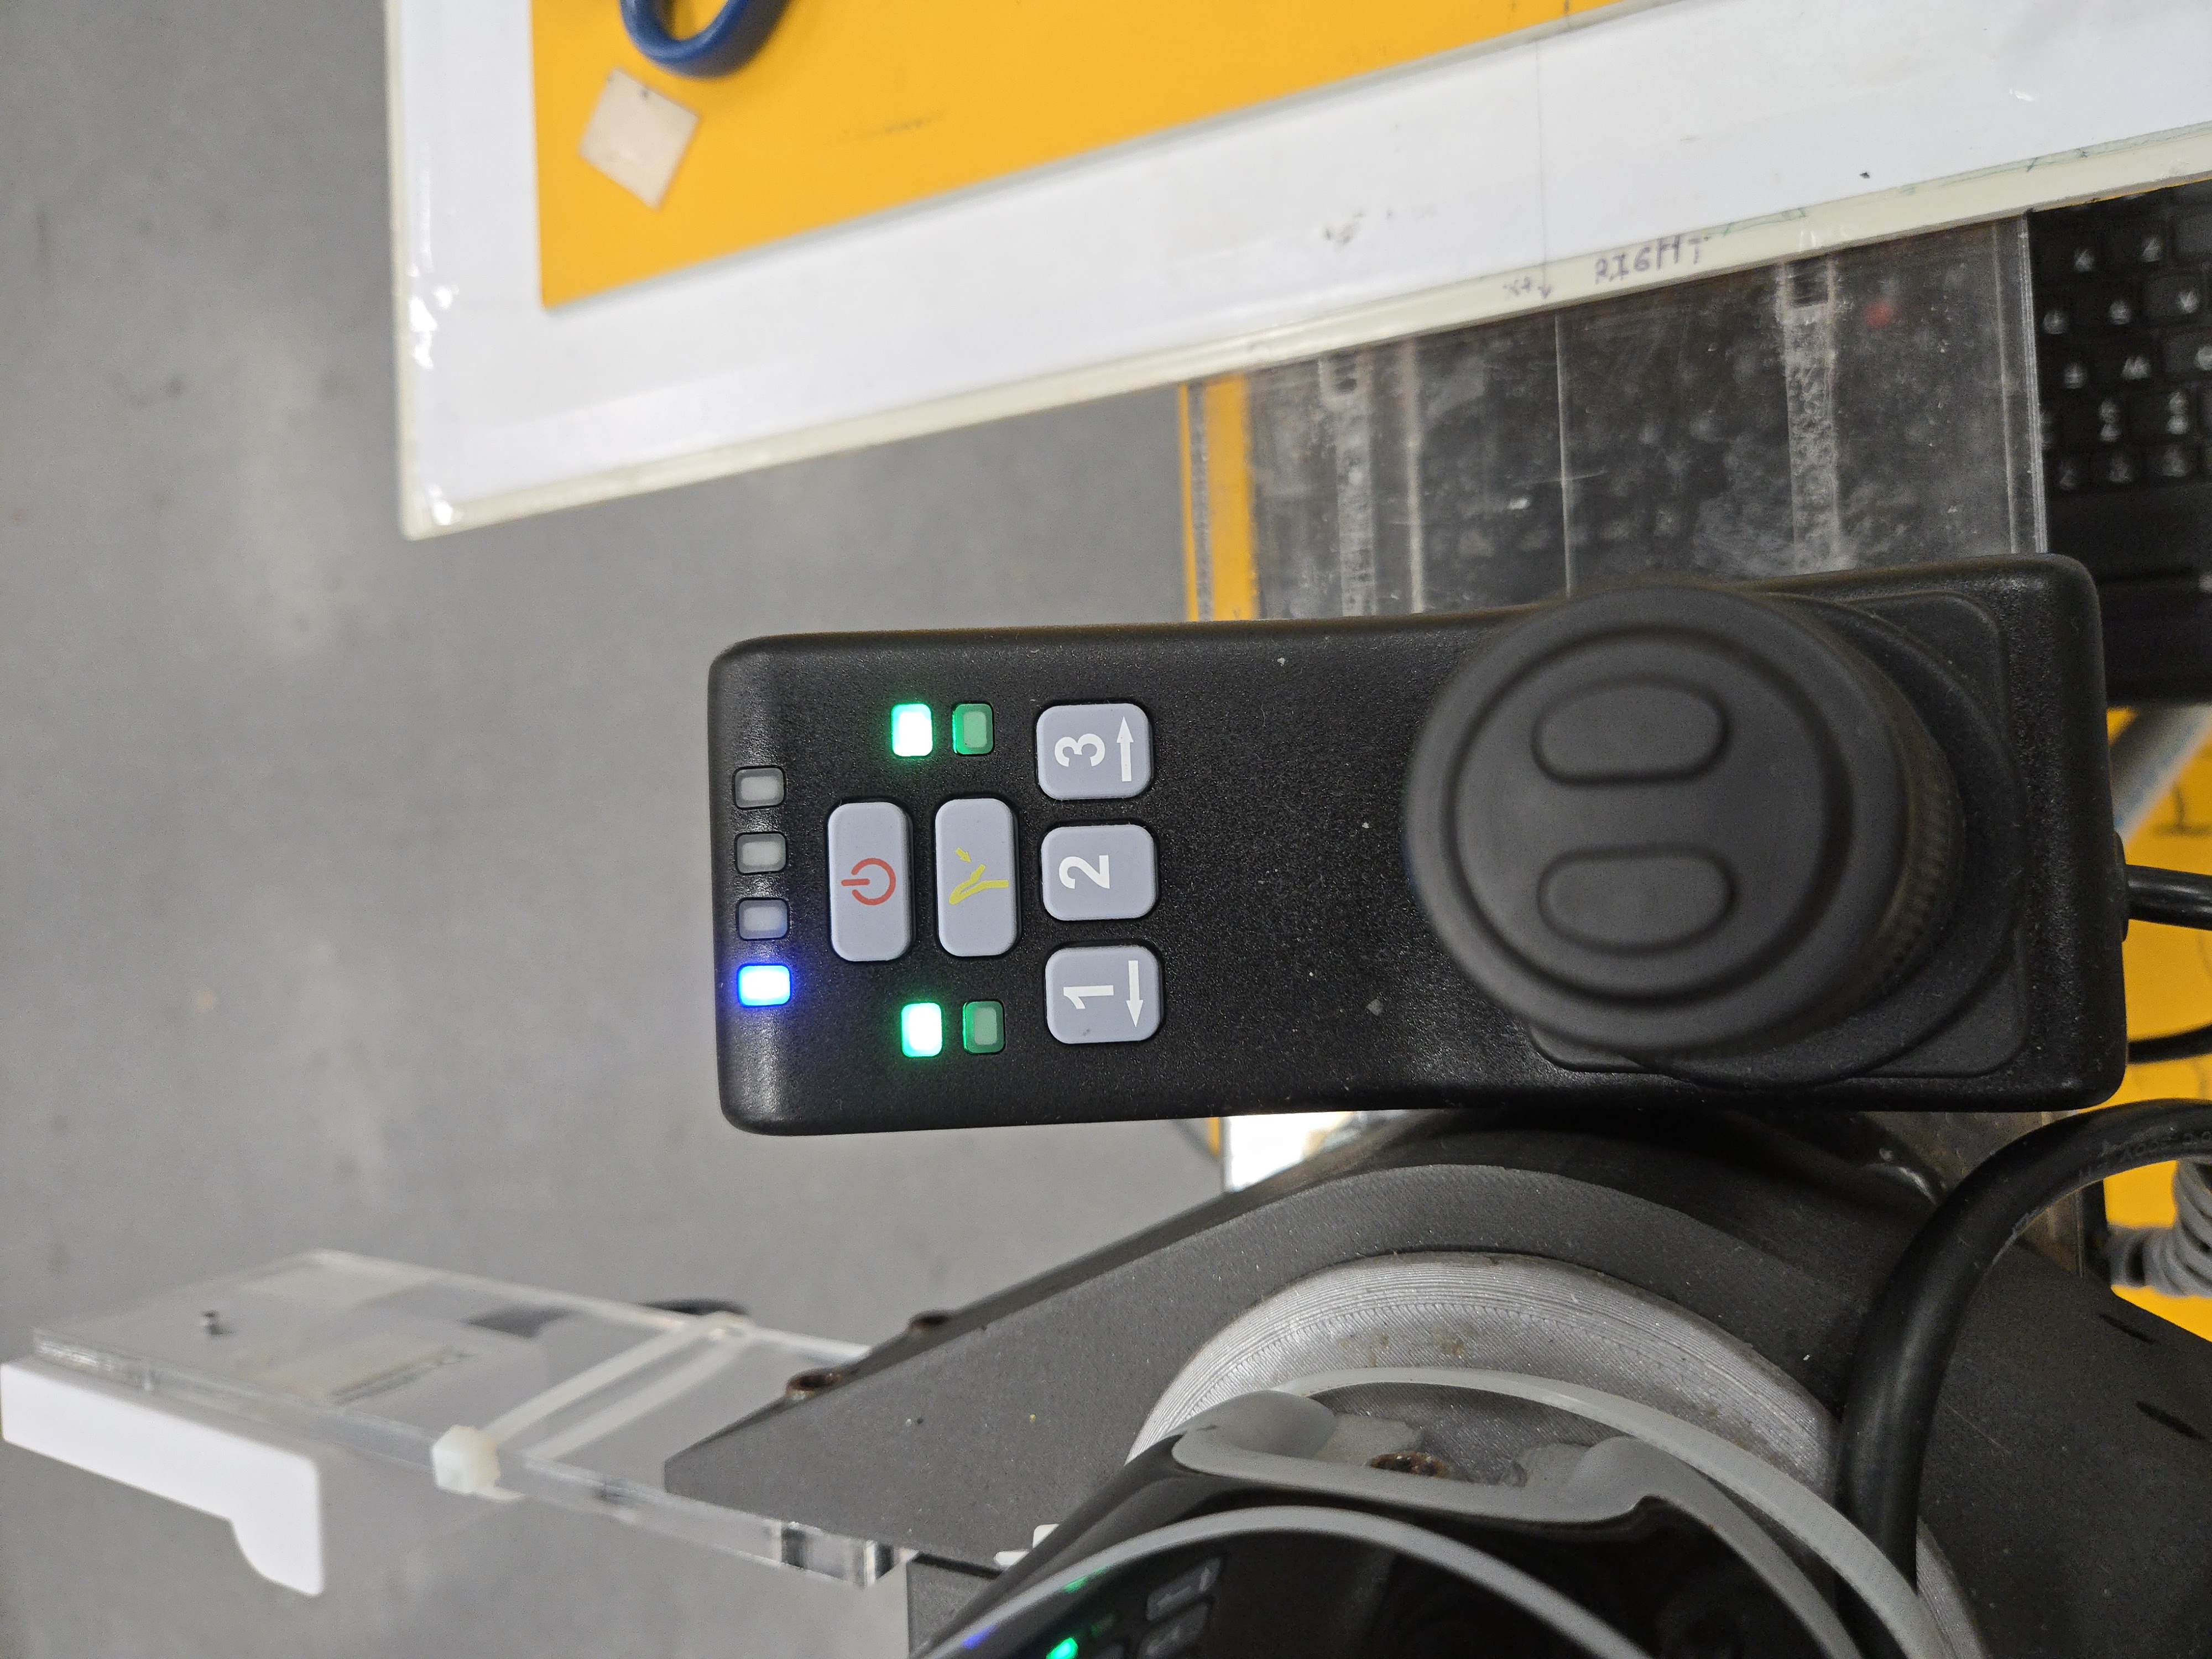
HMI lights in their operational state. The green lights are not flashing
Powering on the Helper Laptop
Ensure the USB-C cable is properly plugged in to the Azure Kinect. This frequently comes out when raising the arm. If needed, loosen the zip-tie holding the USB-C cable.
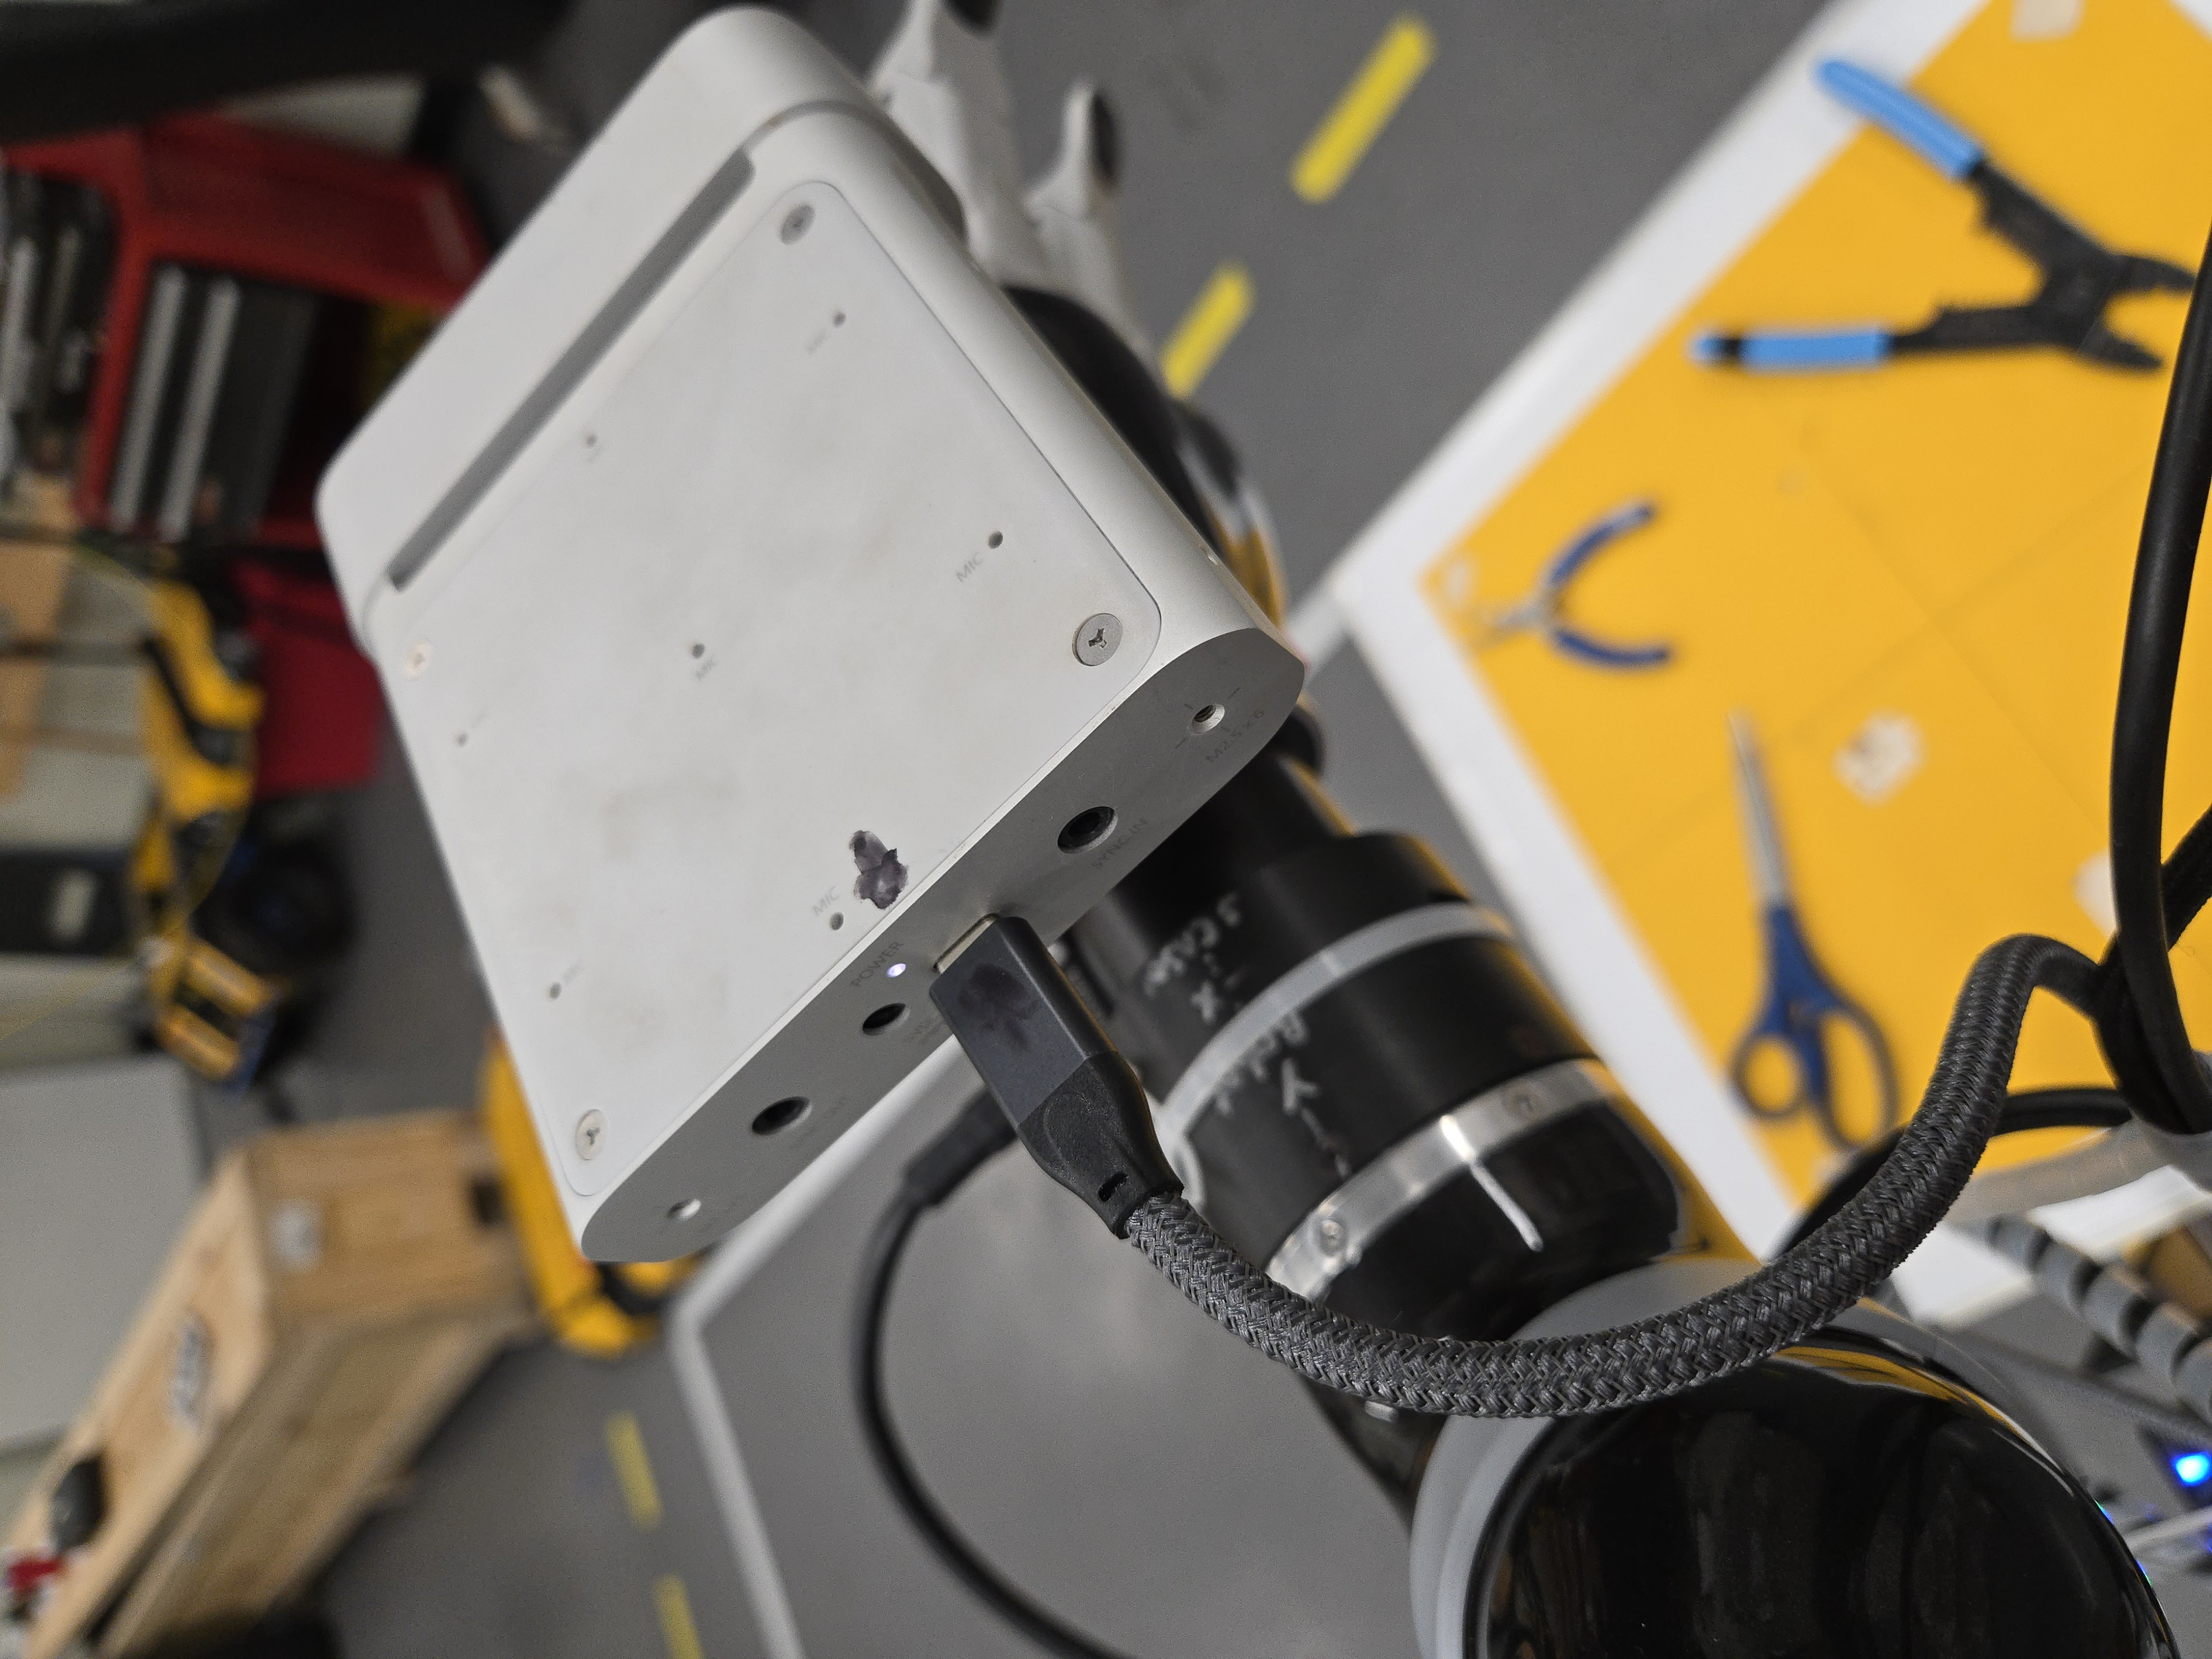
The USB-C port on the back of the Azure Kinect
Open the lid of the helper laptop and press the power button. Wait until the laptop boots up. This may take several minutes. The laptop should automatically log in, and the desktop should be showing. If the laptop has not logged in automatically, do so. The password is 1234.
Sometimes the laptop gets stuck booting or powering off. If the screen is black but the display panel remains on for several minutes, press and hold the laptop power button. Disconnect and reconnect all peripherals and power plugs, and try again.
Shortly after the laptop successfully boots, the ROS nodes should start. Connections to the Azure Kinect and Kinova arm can be verified:
- The Kinova arm fingers should open fully when the ROS nodes start
- The Azure Kinect should have a small solid white light at the front
Powering on the Overhead NUC
Unplug and plug back in the Azure Kinect USB cable connected to the front of the NUC. Power on the NUC by pressing the power button at the front. If the nuc user is not automatically logged in, then log in manually; the password is 1234. Shortly after the NUC boots up, the ROS nodes should start. A good connection to the Azure Kinect can be verified:
- The Azure Kinect at the front of the room should have a small solid white light at the front
The Azure Kinect connection is frequently corrupted. If the light at the front of the Azure Kinect is not white after a minute of the NUC booting up, this is likely the case. Unplug the Azure Kinect cable, plug it back in, and see Restarting OARBot Nodes for instructions on restarting the ROS2 nodes.
Powering on the Tablet
Press the power button on the bottom left side of the tablet. Ensure the E-stop button is disengaged by twisting it clockwise.
Launching the Teleoperation GUI
Open the home directory by double-clicking the Home folder on the desktop. Locate the tablet_launch.sh file. Press and hold on the file until a menu shows up. Select Run as a Program. The GUI should launch. To exit the GUI, press the X in the top right corner of the GUI.
Uncovering the ArUco Tags
Remove the yellow cover plates from each ArUco tag on the OARBot and set them aside. The tags on the cover plates should not be visible to the overhead Kinect.